Frame Selection
Understanding how to properly select frames is crucial for using Text Localizer effectively. This guide explains everything you need to know about frame selection in the plugin.
Frame Selection Rules
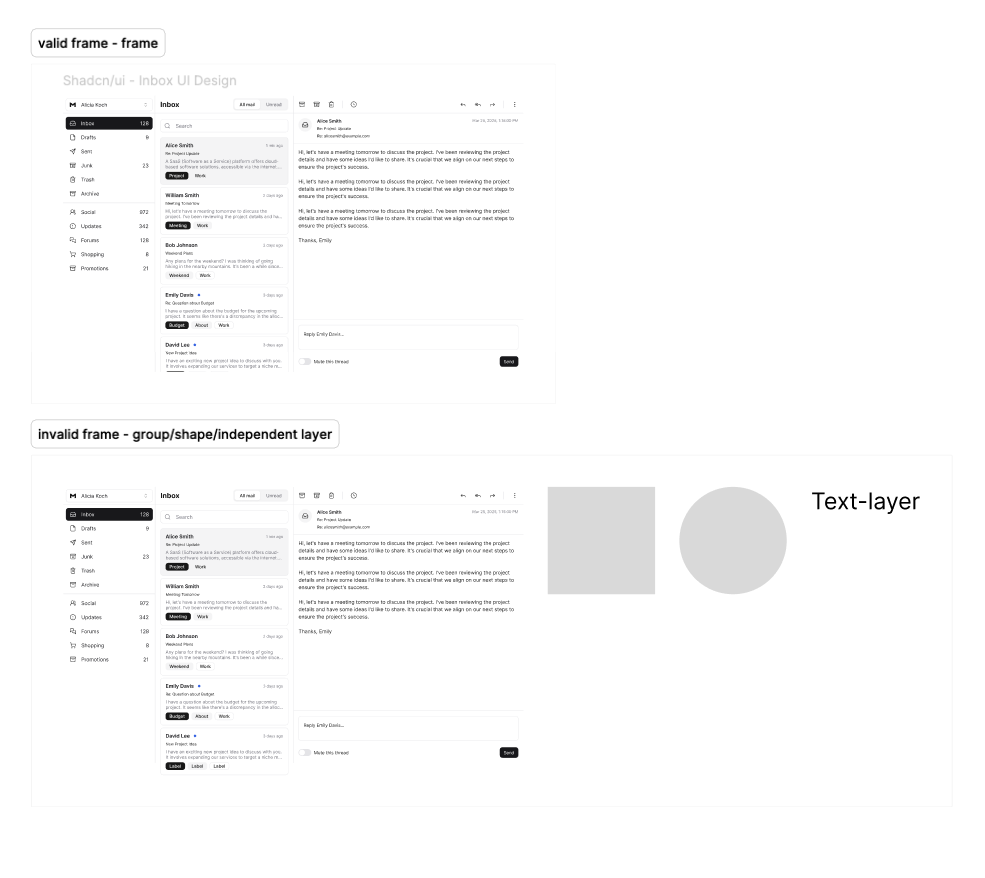
What Can Be Selected
- Only Figma frames
What Cannot Be Selected
- Multiple frames at once
- Components or component instances
- Groups containing text layers
- Individual text layers
- Images or other non-frame elements
- Empty frames (frames without text layers)
Selection Methods
Direct Selection
- Click on the frame you want to analyze
- Ensure only one frame is selected
- Launch the plugin
Frame Requirements
- Must be a Figma frame
- Must contain at least one text layer
- Text layers can be at any depth within the frame
- Frame should be visible (not hidden)
Important
Only standard Figma frames can be processed. Components, groups, or other elements will be considered invalid selections.
Common Selection Issues
Invalid Selection
If you see an error message about invalid selection, check:
- You've selected a Figma frame (not a component or group)
- Only one frame is selected
- The frame contains text layers
- The frame is not hidden
No Frame Selected
If no frame is selected when launching the plugin:
- You'll see a prompt to select a frame
- Select your desired frame
- Click "Scan Frame" in the plugin

Best Practices
Frame Organization
- Keep related text in standard Figma frames
- Use clear frame naming conventions
- Organize frames logically for easier selection
Selection Workflow
- Organize your text layers within Figma frames
- Select the appropriate frame
- Verify it's a standard Figma frame before scanning
- Process one frame at a time
Next Steps
- Learn about Text Layer Detection
- Explore CSV Export options
- Understand Variable Generation
